As fall settles and the temperatures start to drop, it’s time to focus on an essential garden task—winterize your garden. Preparing your garden for winter isn’t just about tidying up; it’s a vital step to ensure your plants, soil, and garden structures are protected from harsh weather conditions. Knowing how to prepare your garden for winter can make the difference between vibrant, healthy spring growth and plants struggling to recover from frost and freezing temperatures.
Whether you’re an experienced gardener or just starting, this comprehensive winter garden care guide will provide all the knowledge you need to effectively protect your plants, shrubs, trees, and soil through the winter months. From protecting garden beds to insulating shrubs and trees, adding mulch, and planting cover crops to prevent soil erosion, we’ll cover each essential step in detail.
Winter garden preparation may seem daunting, but with a few simple steps, you can ensure that your garden not only survives the winter but thrives in spring. This article includes step-by-step instructions and proven winter garden tips to give your plants the best chance to withstand the cold.
By following this guide, you’ll learn about everything from cleaning garden beds to protecting perennial bulbs and mulching your soil. We’ll also share expert tips for planting spring bulbs in fall to maximize your garden’s beauty in the upcoming season. Dive in and discover how to winterize your garden and prepare for a beautiful, resilient garden in the spring.
Why Winterizing Your Garden is Important for Healthy Spring Growth
Winterizing your garden is one of the most crucial steps you can take to ensure that your plants, soil, and overall landscape stay healthy and prepared for the challenges of winter. While some gardeners may think that simply letting nature take its course is enough, the truth is that preparing your garden for winter helps prevent a host of issues that can damage plants, compromise soil quality, and make spring gardening far more challenging. From insulating sensitive plants to managing soil nutrients, winter garden prep helps preserve the beauty and productivity of your outdoor space.
When you protect your garden from frost and cold weather, you’re ensuring that your plants have a better survival rate during the colder months. Freezing temperatures, harsh winds, and heavy snowfall can dry out, damage, and even kill unprotected plants. By taking the time to insulate garden beds, mulch around plants, and cover delicate shrubs, you reduce the chances of frost damage and soil erosion, giving your plants the foundation they need to bounce back in spring.
Winterizing your garden also benefits the soil. As you may know, garden soil quality is essential for plant health, as it provides nutrients and a stable environment for roots. Without winter preparation, soil can become compacted, eroded, or stripped of nutrients. Techniques like planting cover crops and adding a layer of protective mulch help enrich and protect the soil, preventing nutrient loss and erosion while promoting healthy root development. This soil care not only prepares it for spring planting but also boosts the soil’s ability to retain moisture and nutrients, which is essential for thriving, vibrant plants.
Taking steps to winterize your garden also minimizes pest problems. Many garden pests and diseases survive winter by hiding in plant debris left in your beds. By clearing garden beds of old plants and weeds, you reduce the chances of pests emerging in the spring. Additionally, mulching and composting can improve the soil while helping you get rid of dead plant material that may harbor pests.
Overall, winter garden preparation protects your investment in plants and landscaping, saves time and energy in the spring, and ensures a healthier garden ecosystem. With a bit of planning and some proactive steps, you’ll set your garden up for success. When spring arrives, your garden will be ready to thrive, with enriched soil, healthier plants, and fewer pests. So don’t let the colder months catch your garden off-guard—prepare your garden for winter and enjoy the rewards of a vibrant, beautiful landscape come spring.
3 Essential Steps to Winterize Your Garden
Step 1: Clean Out Your Garden Beds
The first step in winterizing your garden is to clean out all dead plants, weeds, and debris from garden beds. By removing old plant material, you’re reducing the likelihood of pests, fungi, and disease over the winter months. Here’s a breakdown of this process:
- Remove Dead Plants: Pull up dead plants and any annuals that have finished blooming. These can harbor pests and diseases if left in the soil.
- Weed Thoroughly: Weeds can take root and thrive during winter if left unchecked. Pull out any weeds from your beds, especially deep-rooted ones.
- Rake the Soil: Use a metal rake to gently loosen compacted soil and allow better water drainage. Raking also helps remove any smaller debris and prepare the soil for mulching.
Cleaning out your garden beds is essential for protecting your soil and keeping your beds healthy throughout winter.
Step 2: Plant Cover Crops
Cover crops are a fantastic way to protect your soil from erosion and nutrient loss during winter. Here are some options and benefits of planting cover crops for winter:
- Clover: Clover not only prevents soil erosion but also adds nitrogen back into the soil, enriching it for spring planting.
- Rye Grass: Rye grass is ideal for colder climates, as it thrives in low temperatures and protects soil structure during frost.
- Vetch and Winter Wheat: Both of these options help suppress weeds, fix nitrogen in the soil, and break down to improve soil fertility by spring.
Planting cover crops during fall keeps nutrients in the soil, reduces erosion, and provides valuable organic matter that will naturally decompose and enrich your soil.
Step 3: Protect Shrubs and Trees
Shrubs and trees often require extra care to survive harsh winter temperatures. Insulating these plants can prevent frost damage, desiccation, and pest intrusion. Here are effective methods to protect them:
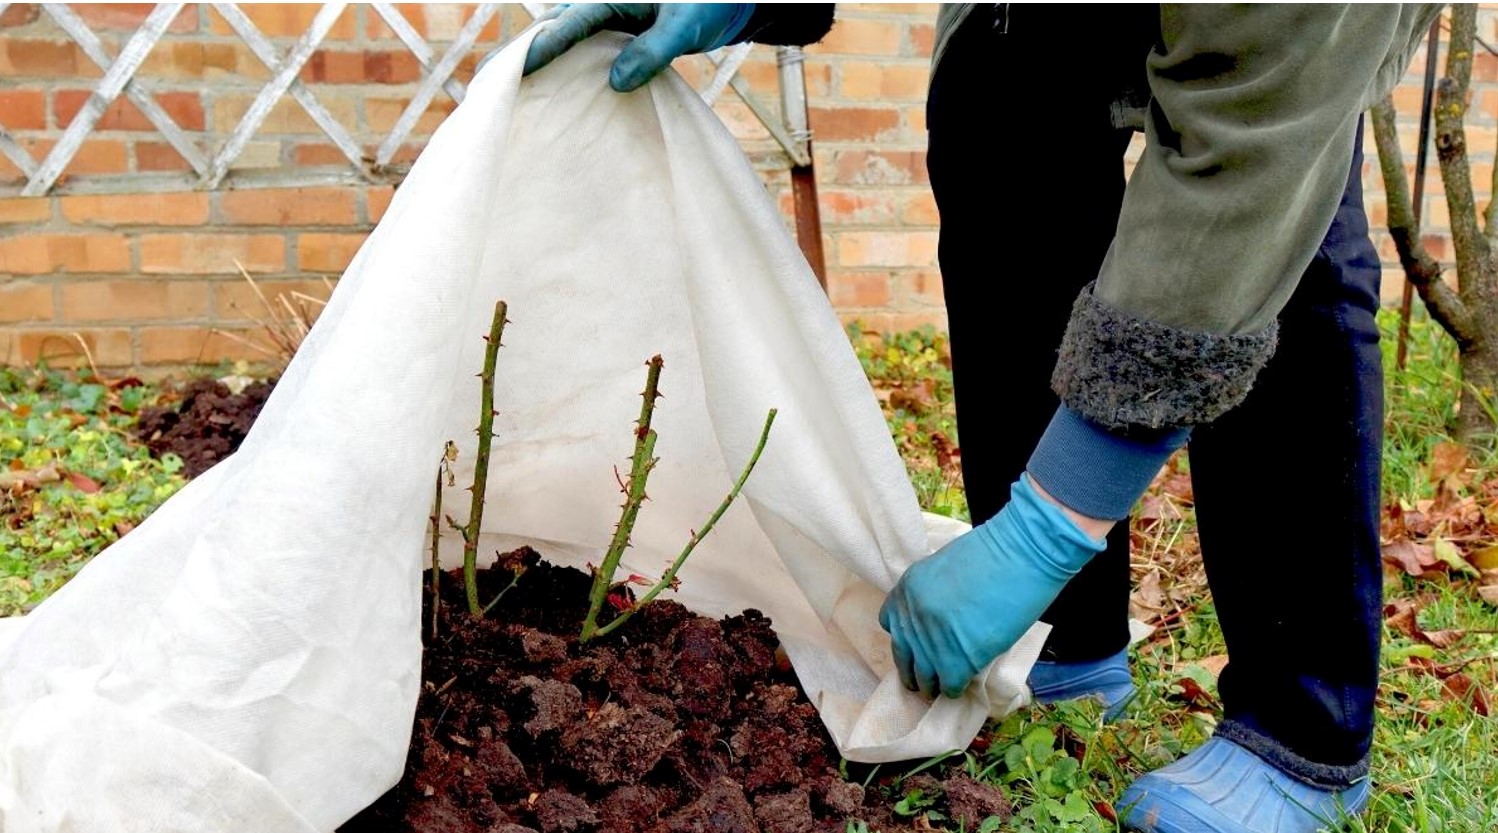
- Wrap in Burlap: Wrapping your trees and shrubs in burlap offers protection from both cold winds and frost damage. Make sure to cover them securely but allow enough room for airflow.
- Apply Mulch Around the Base: Mulching around the base of shrubs and trees insulates roots, retains soil moisture, and helps prevent soil heaving (the process of soil expanding and contracting due to freezing and thawing).
- Use Plant Covers for Sensitive Plants: If you have particularly sensitive plants, consider using breathable plant covers for added protection.
Wrapping and mulching will ensure your shrubs and trees remain insulated, hydrated, and ready to thrive in the spring.
6 Pro Tips for Winterizing Your Garden Like a Pro
To maximize your garden’s protection during winter, follow these top gardening tips to ensure a vibrant, healthy garden in the coming year:
Tip 1: Remove Annuals Completely
Annuals are a beautiful addition to any garden, but once they’ve finished blooming, they should be removed. Here’s why this matters:
- Prevent Seeds from Spreading: Pulling up annuals before they go to seed will prevent unnecessary spreading.
- Tidy Your Garden: Removing annuals helps maintain a clean and organized garden bed.
Removing annuals promptly not only keeps your garden neat but also prevents weeds and unwanted growth in the spring.
Tip 2: Dig Up and Store Perennial Bulbs
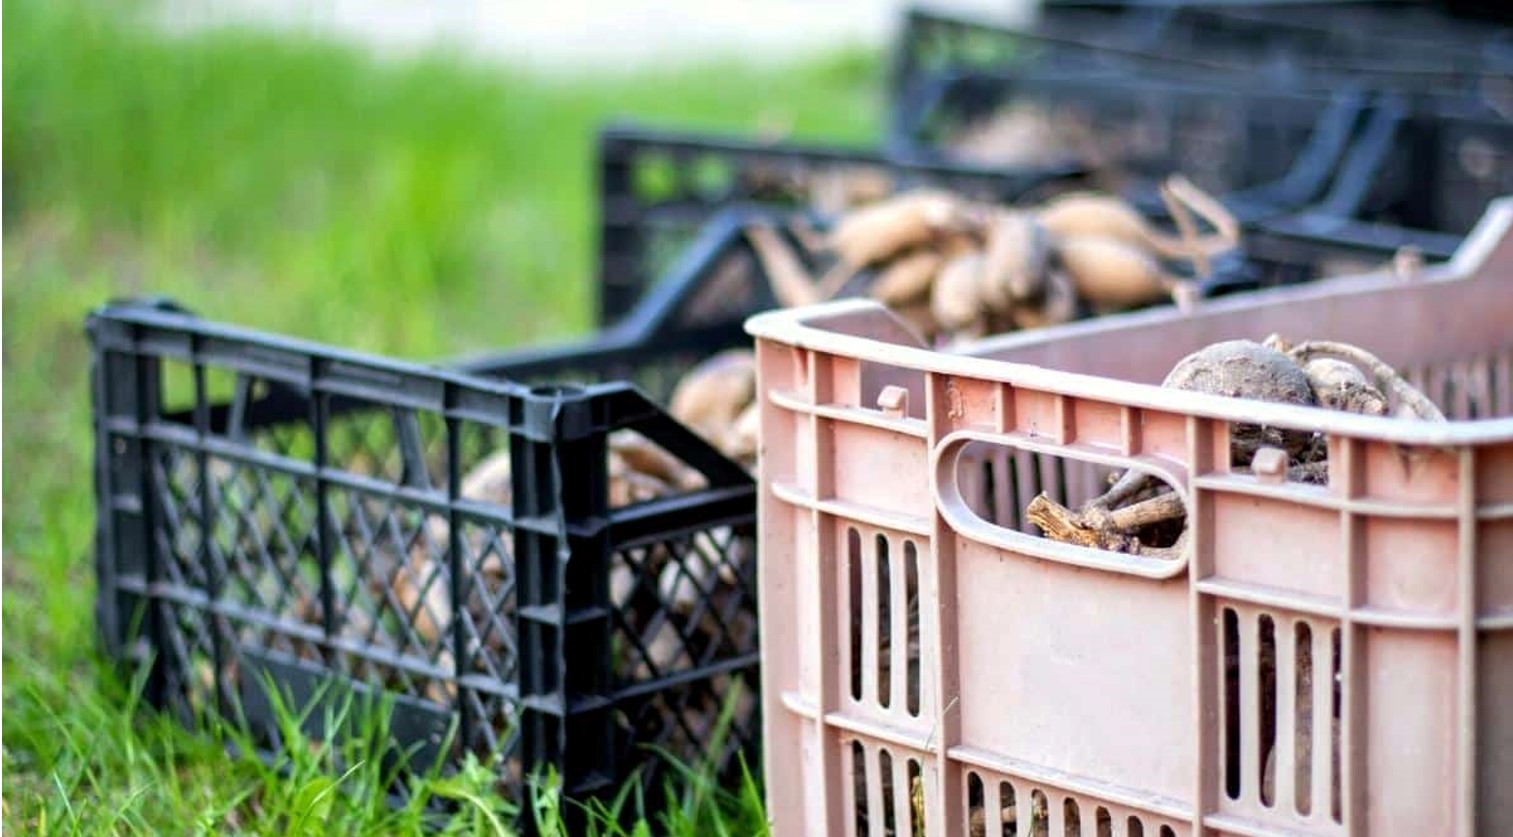
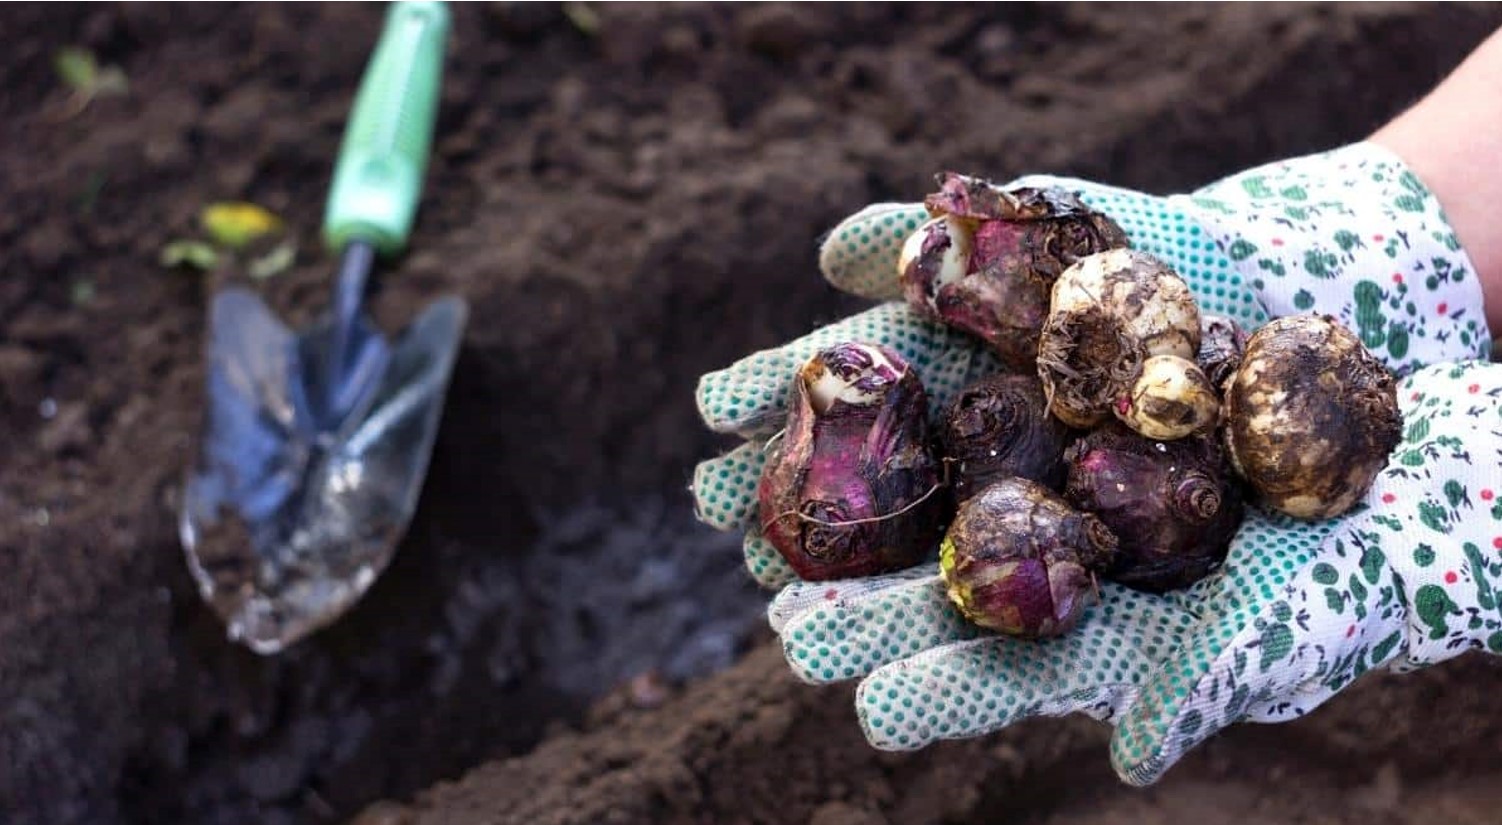
Perennial bulbs like dahlias and gladiolus should be dug up, dried, and stored for winter. Here’s the proper way to care for bulbs:
- Carefully Dig Up Bulbs: Use a small spade to dig up bulbs without damaging them.
- Air-Dry: Allow bulbs to air-dry for several days to prevent mold.
- Store in a Cool, Dark Place: Once dried, place bulbs in a labeled container in a cool, dry location, ideally around 40-50°F.
By storing bulbs properly, you’ll protect them from winter frost and ensure they’re ready to bloom again.
Tip 3: Water Before the Ground Freezes
It’s essential to water your garden deeply before winter if the ground hasn’t frozen yet. Using the right tools, such as an extendable garden hose or a retractable garden hose, can make this task easier and more efficient. Here’s why it’s important:
- Hydrate Plants: Hydrating plants before winter protects them from drying out due to winter winds and cold.
- Ensure Moisture for Roots: Watering deeply before frost allows moisture to reach the roots, which prevents desiccation and keeps the soil from becoming too dry during the winter months.
Consider using a high-quality garden hose that can extend to reach every corner of your garden or easily retract for convenient storage when temperatures drop.
Watering your garden thoroughly before the ground freezes gives your plants the moisture they need to survive winter and thrive in the spring.
Tip 4: Fertilize and Compost the Soil
Adding organic matter to your garden in fall can provide essential nutrients to the soil for the following year. Here’s how to make the most of composting and fertilizing:
- Add Compost to Soil: Composting enriches the soil and improves its texture.
- Use Natural Fertilizers: Fertilizing the soil during fall provides nutrients that break down over winter, feeding plants for spring growth.
Fertilizing and composting your soil in the fall helps ensure your garden starts the new season with nutrient-rich soil, ready for planting.
Tip 5: Transplant and Shelter Vulnerable Plants
If you have plants that are sensitive to frost, consider transplanting them to more sheltered spots:
- Transplant Before Frost Hits: Moving plants to a sheltered area before frost prevents exposure to harsh temperatures.
- Protect Soil and Roots: Consider adding mulch or fabric covers around transplanted plants for additional insulation.
Transplanting and sheltering plants allows them to avoid frost damage and prepares them for a stronger start in spring.
Tip 6: Plant Spring Bulbs Early
Planting spring bulbs during fall is ideal, as it gives them time to root before the ground freezes. Here’s how to do it:
- Choose Early Fall for Planting: Plant bulbs after temperatures have cooled but before the ground freezes.
- Mark Locations: Mark where you’ve planted bulbs to avoid disturbing them during future garden maintenance.
Early planting allows bulbs like tulips and daffodils to establish roots and ensures a beautiful spring bloom.
Winter Garden Care: Additional Tips for Optimal Results
Even after you’ve winterized your garden, a few additional care practices can keep it in top shape throughout the cold season. Here’s what you should keep in mind:
- Inspect for Pests: Look out for burrowing animals and inspect mulch for any signs of insects.
- Protect Vegetable Gardens: Cover any remaining vegetables with frost cloths to extend the growing season.
- Monitor Weather Conditions: Keep an eye on winter weather, and add additional protection when temperatures drop suddenly.
- Regularly Check Mulch Depth: Ensure mulch remains at least 2-3 inches deep around plants.
Following these steps will keep your garden protected and minimize any surprises when spring finally arrives.
Frequently Asked Questions About Winterizing Your Garden
Winterizing your garden can feel overwhelming, especially if you’re new to preparing plants, soil, and garden structures for winter weather. To make things easier, we’ve compiled a list of the most commonly asked questions about how to winterize your garden. These FAQs cover everything from timing and specific plant care to winter soil protection. Read on to get detailed, SEO-optimized answers that address the best practices for preparing your garden for winter and setting it up for a successful spring bloom.
1. When Should I Start Winterizing My Garden?
Timing is everything when it comes to winter garden preparation. Ideally, you should begin preparing your garden for winter as soon as temperatures start to drop consistently in the fall, typically by late October to early November, depending on your location. This timeframe allows enough time to handle tasks like cleaning out garden beds, planting cover crops, and insulating soil before the first frost. If you wait until frost has already arrived, it may be too late for some tasks, like transplanting sensitive plants and adding protective mulch. Starting early gives you a better chance to thoroughly prepare, ensuring your garden is ready for winter and that your plants have a strong foundation to survive the cold.
2. Do I Need to Dig Up All My Perennials Before Winter?
Not all perennials need to be dug up for winter, but some sensitive ones will benefit from overwintering indoors. Plants like dahlias, gladiolus, and certain tender bulbs are best dug up, dried, and stored in a cool, dry place. For most hardy perennials, simply adding a layer of mulch around the base will help protect roots from freezing temperatures. Mulching acts as insulation for the soil and roots, providing protection during frost and cold spells. Check specific recommendations for each type of perennial in your garden to determine if they need to be stored or simply mulched. Proper care will ensure that your perennial plants come back stronger in the spring.
3. Why Is Mulching Important for Winter Garden Protection?
Mulching is one of the most crucial steps in winterizing your garden. Adding a layer of organic mulch, such as straw, shredded leaves, or compost, around plants provides several benefits. Mulch acts as an insulator, keeping the soil temperature more stable and protecting plant roots from extreme cold. It also helps retain moisture in the soil, reducing the need for winter watering. Additionally, mulch prevents soil erosion, which can strip valuable nutrients from the ground during winter rains and snow. For a healthier, more resilient garden, apply mulch around the base of trees, shrubs, and garden beds as part of your fall garden prep.
4. What Are the Best Cover Crops to Plant for Winter?
Cover crops are an excellent way to protect soil from erosion, enrich it with nutrients, and prevent weeds from taking over in the spring. The best cover crops for winter include clover, winter rye, vetch, and winter wheat. These plants are hardy enough to withstand low temperatures and can be tilled into the soil before planting season to add organic matter and improve soil structure. By using cover crops, you’ll create a natural green manure that enhances soil fertility and prepares the bed for spring planting. Planting cover crops in the fall as part of your garden winterization plan is an easy way to ensure your soil stays healthy and rich.
5. How Often Should I Water My Garden in Winter?
Winter watering needs can vary based on your region and garden setup, but in general, it’s best to water your plants before the ground freezes. After the ground freezes, water may not penetrate well, so it’s essential to give plants a deep watering in late fall to ensure they have enough moisture to survive the dry winter months. If you live in an area with mild winters, you may need to water periodically during dry spells.
Keep an eye on the soil; if it’s dry a few inches down, consider watering on days when temperatures are above freezing. Proper winter watering can make a big difference, especially for evergreen plants that continue to lose moisture through their leaves in the winter.
6. Should I Fertilize My Garden Before Winter?
Yes, applying a light layer of fertilizer or compost in fall can help replenish soil nutrients and prepare it for spring. However, avoid heavy fertilizing, as too much nitrogen can promote new growth that may be damaged by frost. Instead, focus on adding organic compost or a balanced slow-release fertilizer, which will break down gradually over the winter, providing a steady nutrient supply. Fall fertilizing and composting is especially beneficial for vegetable gardens and flower beds, setting up nutrient-rich soil that’s ready for planting once warmer weather returns.
7. Can I Use Leaves as Mulch for Winter Garden Protection?
Yes, leaves can be an effective and affordable mulch for winter garden care. However, it’s best to shred the leaves before using them as mulch. Whole leaves tend to mat down and block air and water from reaching the soil. Shredded leaves, on the other hand, create a fluffy layer that allows moisture to penetrate and keeps the soil insulated. Leaves break down naturally over winter, adding organic matter to the soil. Using shredded leaves is an eco-friendly way to mulch and insulate your garden beds, shrubs, and trees for winter.
8. How Can I Protect Shrubs and Trees from Winter Damage?
Protecting shrubs and trees from winter damage is essential, especially for younger plants and sensitive species. One of the best methods is to wrap them in burlap, which helps shield them from harsh winds, freezing temperatures, and animals. Wrap burlap loosely around shrubs, allowing air circulation while providing a protective barrier. For added protection, place a layer of mulch around the base of trees and shrubs. Mulching insulates the roots, preventing freeze-thaw cycles from damaging them. In regions with heavy snowfall, consider adding a windbreak for particularly sensitive trees to prevent snow and ice buildup on branches.
9. Do I Need to Transplant Any Plants Before Winter?
Transplanting certain plants before winter can protect them from frost damage and give them a better chance of surviving cold weather. If you have plants that are particularly sensitive to frost, like tropicals or young perennials, transplanting them into pots or moving them to a more sheltered location, such as a greenhouse, can be beneficial. Be sure to transplant before the first frost hits, as moving plants when the ground is frozen can damage their roots. Transplanting plants before winter is a proactive step to ensure they remain healthy and protected from extreme temperatures.
10. When Should I Plant Spring Bulbs for Best Results?
The ideal time to plant spring bulbs is in the fall, once temperatures cool but before the ground has frozen. Generally, planting bulbs like tulips, daffodils, and crocuses between September and November provides them with the chill period they need for dormancy and strong root development.
Aim to plant bulbs about six to eight weeks before the first hard frost in your area. If you’re unsure where you’ve planted bulbs, mark the spots to avoid disturbing them in spring. Planting bulbs as part of your fall garden prep gives you the best chance for vibrant, colorful blooms in early spring.
These FAQs cover essential aspects of winterizing your garden and provide practical solutions for a successful winter garden preparation. From mulching tips to cover crop recommendations and watering advice, following these best practices will help protect your plants, trees, and soil, setting the stage for a lush, beautiful garden in spring.
Conclusion: Preparing Your Garden for Winter
Winterizing your garden is an investment in a healthy, vibrant spring. By following these steps—cleaning out beds, planting cover crops, protecting shrubs and trees, and implementing our expert tips—you’ll give your garden the best protection possible. This season, take the time to care for your garden, and enjoy the rewards of a lush, flourishing space come spring. Remember, a well-prepared garden is one that’s ready to bloom when warmer weather returns.