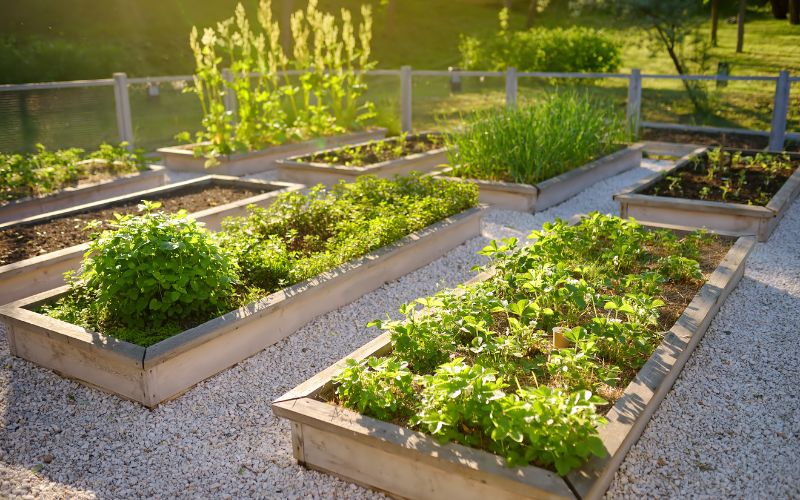
Are you looking for a fun and rewarding way to grow your own vegetables at home? Building a raised garden bed is a great option for those who want to take control of their food and start a sustainable vegetable garden. In this guide, we will show you how to build a raised garden bed step-by-step, and provide you with all the tips and tricks you need to know to have a successful vegetable garden.
Why Build a Raised Garden Bed?
There are many benefits to building a raised garden bed, including:
1. Improved Soil Quality
By using high-quality soil and compost in your raised garden bed, you can create the ideal growing conditions for your plants. This means that your vegetables will have access to the nutrients and minerals they need to thrive, resulting in healthier, more productive plants.
2. Better Drainage
Raised garden beds allow for better drainage than traditional garden beds, which can become waterlogged and cause root rot. This means that your plants are less likely to become waterlogged and more likely to grow healthy and strong.
3. Fewer Weeds
Raised garden beds make it easier to control weeds. By adding a layer of mulch or weed barrier fabric to the bottom of your raised bed, you can prevent weeds from growing and invading your garden.
4. Easier Maintenance
Raised garden beds are easier to maintain than traditional garden beds because they are raised off the ground. This means that you don’t have to bend over as much to tend to your plants, which can be especially beneficial for those with back problems.
5. Aesthetically Pleasing
Raised garden beds can be a beautiful addition to your outdoor space, adding a pop of color and texture to your yard.
Now that we’ve discussed the benefits of raised garden beds, let’s dive into how to build one.
Step 1: Choose a Location
The first step in building a raised garden bed is to choose the ideal location. When choosing a location, consider the following:
1. Sunlight
Most vegetables require at least six hours of direct sunlight each day, so make sure your chosen location receives adequate sunlight.
2. Drainage
Make sure the location you choose has proper drainage to prevent water from pooling in the garden bed.
3. Size
Determine the appropriate size of your garden bed based on the number and size of plants you want to grow.
4. Materials
Decide on the type of material for your raised garden bed. You can use wood, bricks, concrete blocks, or composite materials.
Once you have chosen the ideal location, it’s time to gather your materials.
Step 2: Gather Materials
The materials you’ll need to build a raised garden bed include:
1. Frame Material
Choose the frame material you want to use for your raised garden bed. Pressure-treated wood, cedar, and composite materials are popular options.
2. Screws or Nails
Use screws or nails to attach the sides of your raised garden bed together. Make sure to use screws or nails that won’t rust or corrode over time.
3. Soil and Compost
Choose high-quality soil and compost that is free of weed seeds and disease. A good ratio is 60% soil and 40% compost.
4. Plants
Choose the vegetables you want to grow in your garden bed. Consider the size of your garden bed and the amount of sunlight it receives when choosing your plants.
Now that you have all the materials you need, it’s time to start building your raised garden bed.
Step 3: Construct the Raised Bed

Now that you have all your materials, it’s time to start building your raised garden bed! The first step is to choose the location where you want to build your bed. Select an area that receives ample sunlight and is level to ensure proper drainage.
Next, you’ll need to measure and cut your lumber to size. Use a saw to cut your boards to the desired length and width, making sure to measure twice and cut once. Then, assemble the frame of the bed by screwing the boards together at the corners.
It’s important to ensure that your bed is level before adding soil and plants. You can use a level tool to check that the frame is even on all sides. If the frame is not level, you can add or remove soil as needed to even it out.
Once your raised garden bed is assembled and level, you can move on to the next step: adding soil and compost.
Step 4: Add Soil and Compost
The quality of the soil in your raised garden bed is crucial for the health and growth of your plants. It’s important to use a high-quality soil mix that is rich in nutrients and well-draining.
One way to achieve this is by adding compost to your soil. Compost is a natural fertilizer that is made from decomposed organic matter, such as leaves, grass clippings, and food waste. It’s a great way to enrich your soil and promote healthy plant growth.
To add soil and compost to your raised garden bed, start by filling the bottom of the bed with a layer of gravel or small rocks. This will help with drainage and prevent water from accumulating at the bottom of the bed. Then, fill the bed with a mixture of soil and compost, making sure to mix the two together thoroughly.
If you don’t have access to compost, you can purchase it from your local garden center or nursery. Alternatively, you can create your own compost by starting a compost bin in your backyard. This is a great way to recycle food scraps and yard waste while creating a rich source of natural fertilizer for your garden.
By following these steps and adding good quality soil and compost, you’ll be well on your way to growing a healthy and thriving garden in your raised garden bed.
Step 5: Planting in the Raised Bed
Now that you’ve built your raised garden bed, it’s time to start planting! When choosing plants for your garden, it’s important to select varieties that will thrive in your local climate and growing conditions. You can consult with your local nursery or garden center to find out which plants are best suited for your area.
When planting in your raised garden bed, you should aim to create a well-organized and efficient layout. You can use a garden planner tool to map out where each plant will go, taking into account factors like spacing, sun exposure, and soil type. It’s important to plant your vegetables at the appropriate depth and to water them regularly to ensure that they establish strong roots.
To get the most out of your raised garden bed, it’s important to maintain it properly. This includes watering your plants regularly, removing any weeds or pests, and fertilizing your plants as needed. By taking good care of your garden bed, you can ensure that your plants grow healthy and strong, providing you with a bountiful harvest.
Conclusion
In conclusion, a raised garden bed can be a great addition to your home garden. Not only do they offer practical benefits like easier maintenance and improved soil quality, but they can also be a beautiful and organized addition to your outdoor space. By choosing the right materials, following the proper construction steps, and planting the right crops, you can create a thriving garden that provides you with fresh vegetables and herbs throughout the growing season.
We encourage our readers to try building their own raised garden bed and experience the joys of vegetable gardening firsthand. For more information about vergetable gardening check out our blog Vegetable Gardening for Beginners:The Essential 12-Step Guide.
With the right tools and resources, anyone can build a raised garden bed and enjoy the benefits of growing their own fresh produce at home. But even if you are not able to build a raised garden bed yourself there are many other more ready to use options. For examples click here.
If you want to learn more about gardening and raised garden beds, there are plenty of resources available online and at your local garden center. You can find information on everything from soil quality to pest control, and connect with other gardeners in your area to share tips and advice. With a little bit of effort and a lot of love, you can create a thriving raised garden bed that will provide you with fresh vegetables for years to come.